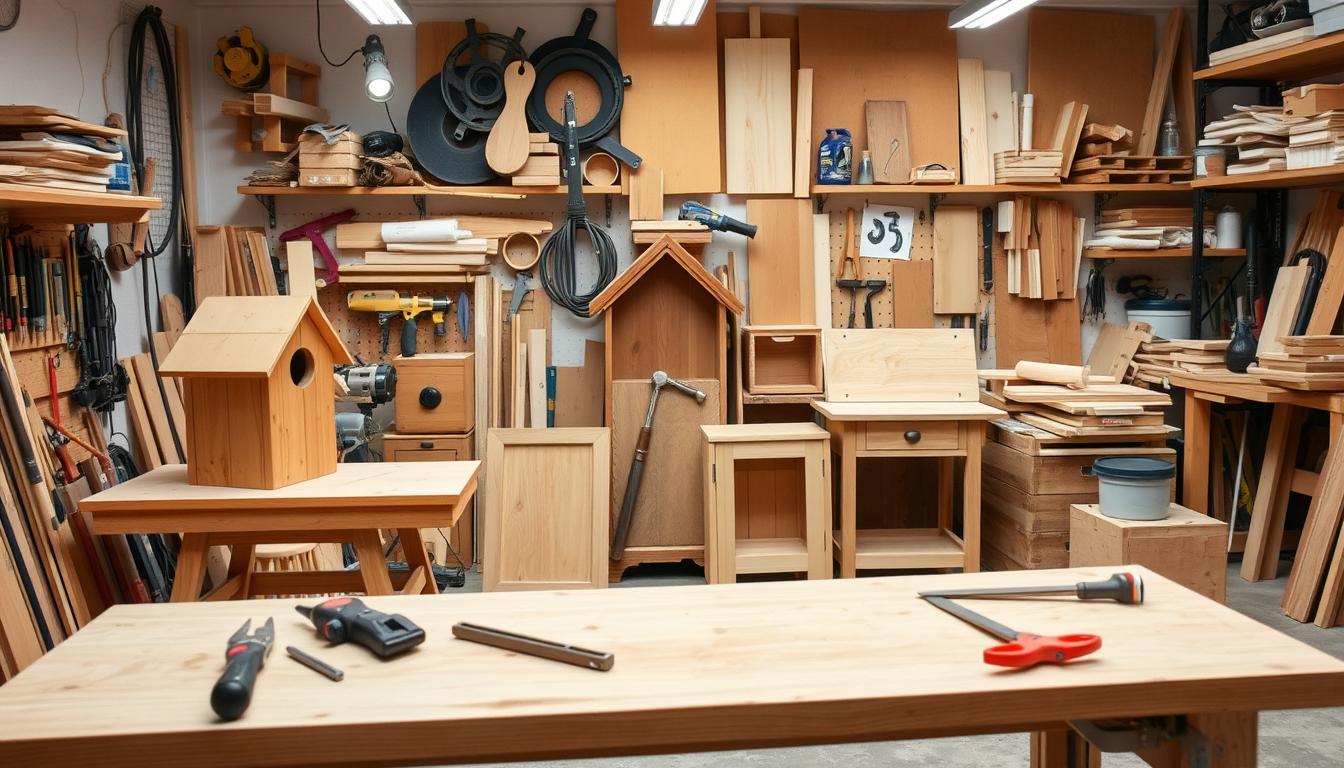
Woodworking is a fun hobby for everyone, no matter your skill level. With the right tools and safety steps, beginners can make beautiful furniture and decor. DIY woodworking saves money because you only need materials, not labor.
Beginners can start with simple projects like wall shelves, candle holders, and cutting boards. These projects need only basic tools and materials.
There are 35 woodworking projects for all skill levels. Most can be done without power tools, just a saw and hammer. Woodworking is rewarding and fun for beginners. It’s a great way to reduce stress and boost mood through creativity.
Beginners can make essential kitchen tools and even furniture like benches and coat racks. Woodworking is about having fun and being creative. With the right tools, you can make unique pieces. So, why not start your woodworking journey today?
Getting Started with Woodworking DIY: Essential Tools
Woodworking needs the right tools for success. Beginners should invest in woodworking tools that make projects easier. A basic kit includes hand tools like chisels, saws, and sandpaper, and power tools like drill presses and saws.
For DIY woodworking tools, start with three chisel sizes: 1/4″, 3/8″ to 1/2″, and 3/4″. A No. 5 Jack bench plane, 12″ to 15″ long, is a good choice. A beginner’s joinery saw, like a Japanese back saw, is also a good pick.
Beginners should also get a small cordless drill or an eggbeater drill. A double-sided Norton oil stone for sharpening and a sturdy workbench are key. A basic clamp set, with two G-clamps and three to four F-clamps, is also important for glue-ups. With these tools, you’re ready to start making woodworking projects.
Safety First: Protecting Yourself While Working with Wood
Woodworking safety is a must for beginners. Common hazards include cuts, splinters, and eye injuries. The Occupational Safety and Health Administration (OSHA) stresses the need for regular tool maintenance. This ensures tools are safe and work well.
Keeping your workspace clean is key to safety. Clutter can cause accidents, and wood dust is a fire risk. Dust collection systems can cut down dust levels by 90%, making the air safer. Wearing safety glasses, gloves, and masks also helps prevent injuries and breathing problems.
Good lighting is vital for clear visibility. OSHA highlights the importance of a disconnect switch for power tools. By following these safety tips, beginners can avoid common injuries and enjoy woodworking safely.
Simple Wooden Shelf Project for Beginners
A simple wooden shelf is a great project for beginners. It requires minimal tools and materials. You can create a beautiful and functional shelf that adds elegance to any room.
Start by planning your project and gathering the necessary tools and materials. You’ll need a saw, a drill, and a sanding block. Use a jigsaw or a flush trim bit for precise cuts. For a basic version, you’ll need two brackets and six anchors to secure the shelves to the wall.
Common shelf sizes vary by room. Kitchen shelves are 11.25” to 12” deep. Bathroom shelves are 5.5” to 8” deep. Living room or display shelves are 5.5” to 9.25” deep.
The wood used is 8ft by 8 inches (pine). You’ll make 2 cuts and drill 4 holes. The project requires 2 brackets per shelf and 4 in total. It takes 2 hours to complete, and materials cost $0.
For a simple wooden shelf project, you’ll need a saw, a drill, and a sanding block. Use a jigsaw or a flush trim bit for precise cuts. You’ll need two brackets and six anchors for a basic version.
The total weight capacity is 450 pounds per shelf. You’ll use 6 anchors per shelf. The recommended tools are a jigsaw, a flush trim bit, and a drill. You can install the shelves in various areas of your home.
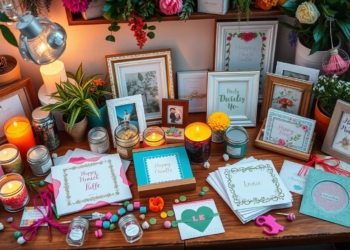
Crafting a Rustic Picture Frame
Making a rustic picture frame can make any room look better. It’s a simple beginner woodworking project that doesn’t need much. You can finish it in under an hour, making it a quick DIY win.
You can use different woods like barn wood or pallet wood for your frame. The secret to a great rustic frame is quality materials and attention to detail. For example, 1×3 boards make a strong frame, and 1 1/4 inch screws or brad nails help put it together.

Customizing your frame is where the fun starts. You can pick from many colors, stains, or paints to make it your own. Adding twine or clothespins can also give it a rustic charm. With some creativity and basic skills, you can make a frame that’s both beautiful and useful.
Creating a rustic picture frame is a fun DIY project for anyone. With the right materials and patience, you can make a unique frame. It will be perfect for showing off your favorite photos and adding elegance to your home.
Building Your First Wood Storage Box
Making a wood storage box is a great way to organize your space. It’s a simple project that needs just a few tools and materials. You can make a box that looks good and works well to keep things tidy.
Choosing the right size is important for your DIY storage box. A box that’s 5″ wide and 8″ long is a good start. You can also use the golden ratio to find the size. For example, a 12” wide box would be about 19.5” long.
The box should be 3″ tall and 1/4″ to 1/2″ thick for the sides. The bottom should be a bit thicker, about 5/16″. This project is perfect for beginners to practice and get better.
Using strong joinery like box joints and dovetails is key. They create strong bonds, making your wood storage box last. With these steps, you can make a box that’s both useful and attractive for your home.
Creating a Customized Cutting Board
Looking for a unique way to make your kitchen more elegant? We’ll show you how to make a customized cutting board. It’s easy and fun, even if you’re new to woodworking. You’ll learn a lot and feel more confident in your skills.
Creating a customized cutting board is a great idea. It’s simple and adds beauty to your kitchen. You’ll need basic tools like a table saw, sandpaper, and a drill press. You can make a board that’s 1 inch thick and 9 inches wide.

The boards are cut to 16 inches long. They start at 0.25 to 0.5 inches thick and get smaller during trimming. Sanding uses grits from 80 to 400, taking 6 steps. Each board loses about 0.25 to 0.5 inches in thickness.
Apply 2 to 3 coats of food-grade mineral oil. Let it sit for 5 minutes before wiping off extra. Etching can make wooden cutting boards special gifts. It’s best on lighter wood tones because dark wood is hard to etch.
Etched cutting boards are great for weddings, housewarmings, birthdays, and Mother’s Day. They’re versatile and make wonderful presents.
Constructing a Simple Side Table
Building a simple side table can add elegance to any room. It requires minimal tools and materials. This project is great for beginners and experienced woodworkers alike.
Constructing a simple side table is a great way to add elegance to any room. It requires minimal tools and materials. With a few hours of crafting, you can create a beautiful and functional table.
This project is perfect for beginners, as it requires minimal tools and materials. It’s a great way to practice skills and build confidence. The estimated cost is $35, and it takes about 4 hours to complete. The difficulty level is moderate, and you’ll need 3 x 2 x 8 boards, 5 x 4 x 8 boards, and 2 x ½ x ½ x 36 inch square dowels.
The project combines basic woodworking skills with a few hours of crafting. It’s a great way to practice skills and build confidence. The cost is $35, and it takes about 4 hours to complete. The difficulty level is moderate, and you’ll need 3 x 2 x 8 boards, 5 x 4 x 8 boards, and 2 x ½ x ½ x 36 inch square dowels.
The simple side table can be constructed from one rough sawn board of timber, measuring 1 x 9 x 8 inches (25mm x 230mm x 2.4m). The series consists of 5 online chapters and includes detailed PDF plans.
The total runtime of the video instruction is over 3 hours. The chapter breakdown is: Chapter One: Timber Preparing – 48 minutes, Chapter Two: The Bridle Guides – 37 minutes, Chapter Three: The Joinery – 44 minutes, Chapter Four: Completing The Build – 50 minutes, Chapter Five: Ebonising & Finish – 45 minutes.
The content emphasizes using a minimal kit of hand tools for efficient building. It’s a great way to practice skills and build confidence.
The side table can be constructed from one rough sawn board of timber, measuring 1 x 9 x 8 inches (25mm x 230mm x 2.4m). The series consists of 5 online chapters and includes detailed PDF plans.
The simple side table can be constructed from one rough sawn board of timber, measuring 1 x 9 x 8 inches (25mm x 230mm x 2.4m). You’ll need 3 x 4 x 8 boards and 2 x ½ x ½ x 36 inch square dowels.
The project combines basic woodworking skills with a few hours of crafting. It’s a great way to practice skills and build confidence. The cost is $35, and it takes about 4 hours to complete. The difficulty level is moderate, and you’ll need 3 x 2 x 8 boards, 5 x 4 x 8 boards, and 2 x ½ x ½ x 36 inch square dowels.
The simple side table can be constructed from one rough sawn board of timber, measuring 1 x 9 x 8 inches (25mm x 230mm x 2.4m). The series consists of 5 online chapters and includes detailed PDF plans. The content emphasizes using a minimal kit of hand tools for efficient building. It’s a great way to practice skills and build confidence. The simple side table can be constructed from one rough sawn board of timber, measuring 1 x 9 x 8 inches (25mm x 230mm x 2.4m). You’ll need 3 x 4 x 8 boards and 2 x ½ x ½ x 36 inch square dowels. The simple side table can be constructed from one rough sawn board of timber, measuring 1 x 9 x 8 inches (25mm x 230mm x 2.4m). The series consists of 5 online chapters and includes detailed PDF plans. The content emphasizes using a minimal kit of hand tools for efficient building. It’s a great way to practice skills and build confidence. The simple side table can be constructed from one rough sawn board of timber, measuring 1 x 9 x 8 inches (25mm x 230mm x 2.4m). You’ll need 3 x 4 x 8 boards and 2 x ½ x ½ x 36 inch square dowels. The simple side table can be constructed from one rough sawn board of timber, measuring 1 x 9 x 8 inches (25mm x 230mm x 2.4m). The series consists of 5 online chapters and includes detailed PDF plans. The simple side table can be constructed from one rough sawn board of timber, measuring 1 x 9 x 8 inches (25mm x 230mm x 2.4m). You’ll need 3 x 4 x 8 boards and 2 x ½ x ½ x 36 inch square dowels. The simple side table can be constructed from one rough sawn board of timber, measuring 1 x 9 x 8 inches (25mm x 230mm x 2.4m). The series consists of 5 online chapters and includes detailed PDF plans. The simple side table can be constructed from one rough sawn board of timber, measuring 1 x 9 x 8 inches (25mm x 230mm x 2.4m). You’ll need 3 x 4 x 8 boards and 2 x ½ x ½ x 36 inch square dowels. The simple side table can be constructed from one rough sawn board of timber, measuring 1 x 9 x 8 inches (25mm x 230mm x 2.4m). The series consists of 5 online chapters and includes detailed PDF plans. The simple side table can be constructed from one rough sawn board of timber, measuring 1 x 9 x 8 inches (25mm x 230mm x 2.4m). You’ll need 3 x 4 x 8 boards and 2 x ½ x ½ x 36 inch square dowels. The simple side table can be constructed from one rough sawn board of timber, measuring 1 x 9 x 8 inches (25mm x 230mm x 2.4m). The series consists of 5 online chapters and includes detailed PDF plans. The simple side table can be constructed from one rough sawn board of timber, measuring 1 x 9 x 8 inches (25mm x 230mm x 2.4m). You’ll need 3 x 4 x 8 boards and 2 x ½ x ½ x 36 inch square dowels. The simple side table can be constructed from one rough sawn board of timber, measuring 1 x 9 x 8 inches (25mm x 230mm x 2.4m). The series consists of 5 online chapters and includes detailed PDF plans. The simple side table can be constructed from one rough sawn board of timber, measuring 1 x 9 x 8 inches (25mm x 230mm x 2.4m). You’ll need 3 x 4 x 8 boards and 2 x ½ x ½ x 36 inch square dowels. The simple side table can be constructed from one rough sawn board of timber, measuring 1 x 9 x 8 inches (25mm x 230mm x 2.4m). The series consists of 5 online chapters and includes detailed PDF plans. The simple side table can be constructed from one rough sawn board of timber, measuring 1 x 9 x 8 inches (25mm x 230mm x 2.4m). You’ll need 3 x 4 x 8 boards and 2 x ½ x ½ x 36 inch square dowels. The simple side table can be constructed from one rough sawn board of timber, measuring 1 x 9 x 8 inches (25mm x 230mm x 2.4m). The series consists of 5 online chapters and includes detailed PDF plans. The simple side table can be constructed from one rough sawn board of timber, measuring 1 x 9 x 8 inches (25mm x 230mm x 2.4m). You’ll need 3 x 4 x 8 boards and 2 x ½ x ½ x 36 inch square dowels. The simple side table can be constructed from one rough sawn board of timber, measuring 1 x 9 x 8 inches (25mm x 230mm x 2.4m). The series consists of 5 online chapters and includes detailed PDF plans. The simple side table can be constructed from one rough sawn board of timber, measuring 1 x 9 x 8 inches (25mm x 230mm x 2.4m). You’ll need 3 x 4 x 8 boards and 2 x ½ x ½ x 36 inch square dowels. The simple side table can be constructed from one rough sawn board of timber, measuring 1 x 9 x 8 inches (25mm x 230mm x 2.4m). The series consists of 5 online chapters and includes detailed PDF plans. The simple side table can be constructed from one rough sawn board of timber, measuring 1 x 9 x 8 inches (25mm x 230mm x 2.4m). You’ll need 3 x 4 x 8 boards and 2 x ½ x ½ x 36 inch square dowels. The simple side table can be constructed from one rough sawn board of timber, measuring 1 x 9 x 8 inches (25mm x 230mm x 2.4m). The series consists of 5 online chapters and includes detailed PDF plans. The simple side table can be constructed from one rough sawn board of timber, measuring 1 x 9 x 8 inches (25mm x 230mm x 2.4m). You’ll need 3 x 4 x 8 boards and 2 x ½ x ½ x 36 inch square dowels. The simple side table can be constructed from one rough sawn board of timber, measuring 1 x 9 x 8 inches (25mm x 230mm x 2.4m). The series consists of 5 online chapters and includes detailed PDF plans. The simple side table can be constructed from one rough sawn board of timber, measuring 1 x 9 x 8 inches (25mm x 230mm x 2.4m). You’ll need 3 x 4 x 8 boards and 2 x ½ x ½ x 36 inch square dowels. The simple side table can be constructed from one rough sawn board of timber, measuring 1 x 9 x 8 inches (25mm x 230mm x 2.4m). The series consists of 5 online chapters and includes detailed PDF plans. The simple side table can be constructed from one rough sawn board of timber, measuring 1 x 9 x 8 inches (25mm x 230mm x 2.4m). You’ll need 3 x 4 x 8 boards and 2 x ½ x ½ x 36 inch square dowels. The simple side table can be constructed from one rough sawn board of timber, measuring 1 x 9 x 8 inches (25mm x 230mm x 2.4m). The series consists of 5 online chapters and includes detailed PDF plans. The simple side table can be constructed from one rough sawn board of timber, measuring 1 x 9 x 8 inches (25mm x 230mm x 2.4m). You’ll need 3 x 4 x 8 boards and 2 x ½ x ½ x 36 inch square dowels. The simple side table can be constructed from one rough sawn board of timber, measuring 1 x 9 x 8 inches (25mm x 230mm x 2.4m). The series consists of 5 online chapters and includes detailed PDF plans. The simple side table can be constructed from one rough sawn board of timber, measuring 1 x 9 x 8 inches (25mm x 230mm x 2.4m). You’ll need 3 x 4 x 8 boards and 2 x ½ x ½ x 36 inch square dowels. The simple side table can be constructed from one rough sawn board of timber,
Essential Wood Finishing Techniques
Starting your woodworking journey? Learning wood finishing is key to making your DIY projects stand out. You’ll find everything from natural-looking penetrating finishes to durable surface finishes. Each has its own benefits, whether you like brushed or sprayed finishes.
Exploring DIY wood finishing opens up a world of possibilities. You can use stains and dyes to change the color and tone of your work. Whether it’s for kitchenware or furniture, there’s a finish for every project. Mastering these techniques will take your woodworking to the next level.